A useful home plumbing check starts with visible moisture, fixture behavior, and changes in water use. Inspect accessible sinks, toilets, and appliance connections, record anything unusual, and follow up on unresolved findings. This checklist helps organize observations; it cannot certify concealed plumbing or replace a professional inspection.
Set aside a time when you can walk through the home without rushing. A monthly reminder can help establish a habit, but that is an organizational suggestion rather than a universal maintenance interval. Follow manufacturer schedules, rental agreements, and professional advice for your equipment.
Found a problem during your walkthrough? Use our plumbing troubleshooting guide to choose the article matching the symptom.
Prepare a simple record
Add the verified location of your main household water shutoff valve and emergency contacts. If several fixtures have changed flow, our pressure measurement guide explains how to record a useful reading without adjusting the regulator.
Bring a flashlight, your phone for photographs, and a notes app or sheet of paper. Start with the date, the areas you can access safely, and any known unresolved issue. If this is your first check, the goal is to create a baseline rather than label every old mark as a new leak.
Do not remove access panels, open electrical enclosures, move heavy appliances, or enter unsafe spaces for this walkthrough. Photograph inaccessible areas from a safe position and note that they were not checked. “Not inspected” is more useful than an unsupported “all clear.”
Your plumbing walkthrough: tick as you check
Use each checkbox to track the areas you have inspected. A check means “looked at,” not “leak-free.” The boxes are temporary; print this page or copy your findings before leaving.
Record: date · location · first sign of moisture or unusual sound · photo filename · action · recheck date.
If an area is inaccessible, mark it “not checked.” A dry visual check does not rule out hidden leakage.
Cold weather forecast, or a change after freezing? Use the seasonal plumbing follow-up paths before continuing the routine walkthrough.
Save your checklist selections
Select the prompts you want to keep. Add your observations and date to your own notes; a selected box is not a finding.
Use your device to copy the checklist or written calculation into your own notes.
The room-by-room checklist
| Check | What to record | Follow-up if something changed |
|---|---|---|
| Sink cabinets and accessible connections | New droplets, stains, damp storage, or visible corrosion. | Use the under-sink leak checks to record when and where moisture appears; arrange diagnosis for persistent leakage. |
| Toilets after a normal flush | Whether filling stops, starts again later, or becomes unusually slow. | Choose running-toilet checks for continued or recurring refilling, or slow tank refill checks when filling eventually stops. |
| Faucets and shower heads after shutoff | Where the first drop appears, whether it stops completely, and whether it returns without use. | Compare a dripping faucet after shutoff with shower-head drain-down versus continuing dripping. |
| Shower and sink flow | Which outlets changed and whether hot, cold, or both are affected. | Start with weak flow at one faucet or weak flow in the shower only, according to the location you observed. |
| Bathroom sink drainage | Water collecting in the basin during ordinary use, or a stopper that barely opens. | Follow the slow bathroom sink drain checks; stop if chemicals are present or other fixtures back up. |
| Visible appliance supply and drain areas | Moisture inside an unused washer drum versus at a hose, wall valve, or nearby floor. | Use the washer leaking while off guide to choose the appropriate service path. Keep away from wet electrical equipment; do not dismantle connections. |
| Water bill or usage portal | Consumption, billing days, and actual versus estimated readings. | Compare daily water use, then follow the high bill with no visible leak checks if the increase remains unexplained. |
The EPA’s Fix a Leak resources identify toilet leaks, dripping faucets, and leaking fittings as useful places to investigate. The worksheet above adds a way to record your observations and assign follow-up rather than treating a quick walk as a repair.
Photo guide: where to look
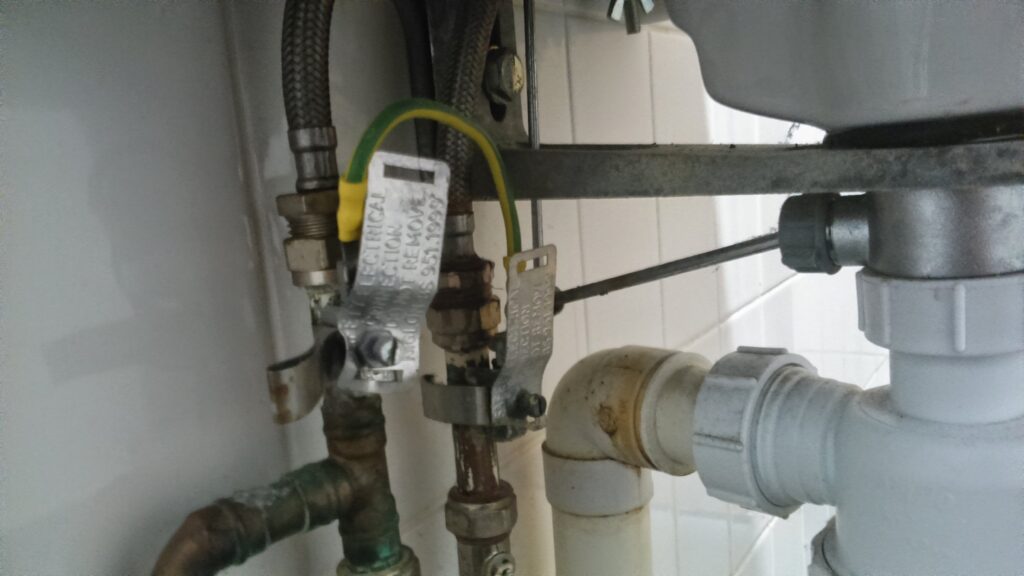
- Left: supply hoses and metal connections. Look for fresh beads of water, staining or crust around the joints. Do not loosen a fitting or disturb the visible electrical bonding wire or clamps.
- Right: drain joints. Observe the outside of the white plastic connections during ordinary sink use, then check the cabinet floor beneath them.
- Record the first wet point. Water can run along a pipe before dripping; the lowest drop may not be the source.
Inside the toilet: watch the end of refilling
Open the full-size animation if it does not display here.
Watch the black fill valve at the left and the opening of the yellow-rimmed overflow tube. Note whether refilling stops and whether it restarts later without a flush. Also inspect the toilet’s exterior base and supply connection; those areas are outside this photo. For the next check, use the running toilet guide.
Make sink observations specific
Open an accessible cabinet and look before touching anything. Note whether a mark is dry or there is fresh moisture. If there is no active leak or electrical hazard, observe normal sink use briefly and check whether visible moisture changes. Stop using the fixture if water escapes into the cabinet or floor.
Write “fresh droplets below the drain after normal use” rather than simply “sink broken.” The first description helps distinguish a drain-related observation from moisture present while the faucet is off. It still does not prove the exact failed joint.
For a drip from the spout after closing the handle, see why a faucet keeps dripping after shutoff. Avoid tightening every visible fitting as a preventive measure; you can damage sound connections or obscure the original problem.
Listen through one toilet refill
Watch a normal flush from a safe position, then wait for the refill to finish. Record whether the toilet stops normally, continues running, or restarts later. A short observation can miss intermittent trouble, so add reports from anyone who has heard unexpected refilling.
A slow-filling tank and a continuously running toilet call for different checks. Record the pattern before ordering parts. Do not change the float or chain just to make the checklist look complete.
When you suspect a silent tank-to-bowl leak, the EPA recommends checking with food coloring and observing the bowl after ten minutes without flushing, then flushing afterward to reduce staining. That test applies to an ordinary accessible gravity tank; follow system-specific instructions for other designs.
Look at appliance areas without disturbing equipment
If you find moisture between laundry loads, use our washer leaking while off guide to distinguish drum water from an external supply or drain leak. During an outdoor walkthrough, note any hose faucet leakage without repeating a test that sends water into the building.
Check only what is safely visible around washing machines, dishwashers, and water-heating equipment. A dry floor at the front does not prove the rear connections are dry. Note access limits and arrange service if there is an unexplained wet area, damaged connector, or sign of leakage.
Do not operate relief valves, drain a water heater, adjust gas controls, or open electrical covers as part of this checklist. Those are separate procedures with equipment-specific requirements. Water near electricity, a gas odor, or a suspected contaminated backup needs urgent qualified assistance, not routine troubleshooting.
If you find water around a heater during the walkthrough, use the water-heater leak guide to review the hazard limits and prepare a service report. Record only what is already visible from a safe, dry position.
Compare usage fairly
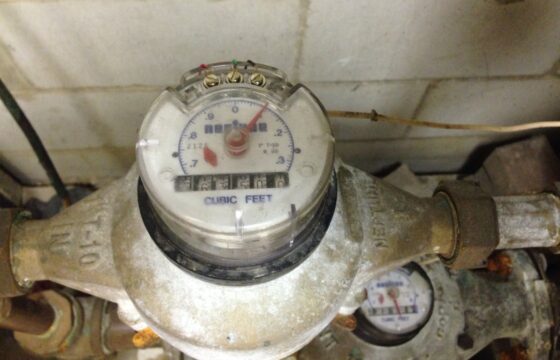
Read the consumption section of the bill rather than comparing only the amount owed. A longer billing period, an estimated reading, a rate change, or extra occupancy can change the result. The EPA’s water-bill guide explains common bill information and units.
For a simple example, 6,000 gallons over 30 days and 7,000 gallons over 35 days both average 200 gallons per day. These hypothetical figures show why comparing equal time periods matters; they are not a target for your household.
To compare your own figures, use the water-bill calculator for gallons per day. Record each bill’s units and service dates alongside the result. The calculation compares consumption; it does not diagnose a leak.
If consumption remains unexplained, follow our high water bill investigation. Keep meter readings, dates, and notes about unusual use so the utility can evaluate a specific question.
Choose a follow-up guide for the symptom you found
Use the observation from your walkthrough to choose a next step. A wet surface, weak spray, and slow drain are different problems even when they occur in the same bathroom.
- The shower is weaker than nearby fixtures: start with shower-only low-flow checks and record the spray setting.
- Many fixtures are weak even when used separately: follow the whole-house low-pressure checks and record whether hot, cold, or both changed. If the change began during or just after freezing weather, start with the cold-weather follow-up paths.
- Flow becomes weak only when several fixtures run: use the simultaneous-use pressure guide and list the fixtures involved.
- A gauge reading is unexpectedly high: use the high household pressure guide; record the test location and conditions before changing a setting.
- A pressure-reducing valve may be involved: use the pressure regulator symptom record to prepare model details and observations for a plumber. Symptoms alone do not prove the valve has failed.
- The shower drips after the control is off: compare residual drain-down with continuing leakage, then keep a dated shower drip record for service.
- Water collects in the bathroom sink: use the slow-draining sink guide to identify the stopper and warning signs.
- The outside of a toilet tank becomes wet: compare condensation patterns with localized leaks before selecting parts.
- The toilet bubbles while the shower drains: read the shared-drain warning signs; stop adding water if the bowl rises or wastewater appears.
- A sprinkler head leaks after watering stops: compare low-head drainage with valve leakage using the timing already observed.
- The toilet flush is weak after the tank refills: compare tank water delivery with bowl drainage; do not keep flushing a rising bowl.
- A sink develops an unusual odor: start with the sink-odor guide’s safety checks before investigating the water or drain area.
For one fixture that has become slow, choose the shower drain checks or the bathtub stopper and drain checks. Record changes during ordinary use; stop for rising wastewater or several affected fixtures.
Copy this plumbing maintenance record
Use one record for each finding. Copy the fields into your notes, or print this page and fill them in by hand. Keep the record with the relevant photograph so you can compare the same location next time.
| Field | Your entry |
|---|---|
| Date and time | ____________________________ |
| Exact room and fixture | ____________________________ |
| Check status | No change seen / change observed / not checked |
| What you saw or heard | ____________________________ |
| When it happened | Fixture off / during ordinary use / after use / unknown |
| Comparison and access limits | What changed from the earlier check? What could you not see? |
| Photo or note reference | ____________________________ |
| Next action, responsible person, and due date | ____________________________ |
| Follow-up result and date | Resolved / still present / awaiting service / not rechecked |
Hypothetical example: “Upstairs hall vanity: a fresh droplet appeared below the drain during ordinary use; photo vanity-01. Stopped using the sink and reported it to the property manager today. Cause not confirmed; awaiting service.” This records evidence and an action without naming a failed part.
Use “no change seen” only for the area and time you actually observed. It does not certify hidden plumbing. An active leak, sewage backup, or water near electricity needs appropriate help immediately; do not postpone it to a routine recheck date.
Prepare for freezing weather
Before a forecast freeze, add a seasonal pass for exposed supply lines, outdoor faucets, and known cold spots. The frozen-pipe prevention checklist separates preparation, cold-snap actions, and after-thaw leak checks. Record unresolved insulation or shutoff questions before cold weather makes them urgent.
Turn findings into actions
Give every finding an owner and a next step. “Ask the landlord about moisture beneath the vanity today” is actionable. “Monitor plumbing” is easy to forget. Renters should document and report issues under their tenancy arrangements before arranging alterations.
| Priority | Example | Response |
|---|---|---|
| Immediate | Active water escape or water near electrical equipment. | Stop the routine check, keep clear of hazards, and obtain appropriate help. |
| Prompt diagnosis | Recurring moisture, continuous dripping, or unexplained refilling. | Arrange the relevant check or professional service. |
| Record and recheck | An old dry stain with no known history. | Photograph and compare; escalate if it changes or the source is uncertain. |
Use sensors as an extra layer
For locations you rarely see, consider whether a detector could provide earlier notice. Our guide to water leak sensor placement explains collection areas, sensing contacts, and alert testing. A quiet sensor does not confirm that all plumbing is sound.
Choose a tool or part for the finding
The walkthrough itself needs no specialist shopping list. If a follow-up check calls for equipment, use the relevant selection guide before ordering:
- Choose a water-pressure gauge: distinguish the thread, dial size, and pressure scale.
- Choose a toilet repair part: match the mechanism and exact model before selecting a flapper, seal, valve, or kit.
- Choose leak-detector features: match the sensing location and the way an alert will reach someone.
Plan repair spending
The visual checklist requires no specialist tools. If a problem needs service, ask for an itemized quote in USD that separates diagnosis, parts, labor, and any access or finish repair. Describe the finding before asking for a particular part to be replaced.
Compare equivalent scopes and keep invoices with your inspection notes. There is no single honest repair price for “a plumbing check” when the required work has not been identified.
Frequently asked questions
How often should I do this?
Choose a repeatable reminder suited to your home, with extra checks after a reported problem or plumbing work. A monthly reminder is a planning option, not a warranty or code requirement.
Does a dry walkthrough rule out hidden leaks?
No. Concealed or intermittent leaks can be missed. Follow up on unexplained consumption and recurring changes.
Should I replace hoses and valves every year?
Use manufacturer requirements, condition, and qualified advice rather than an invented universal interval.
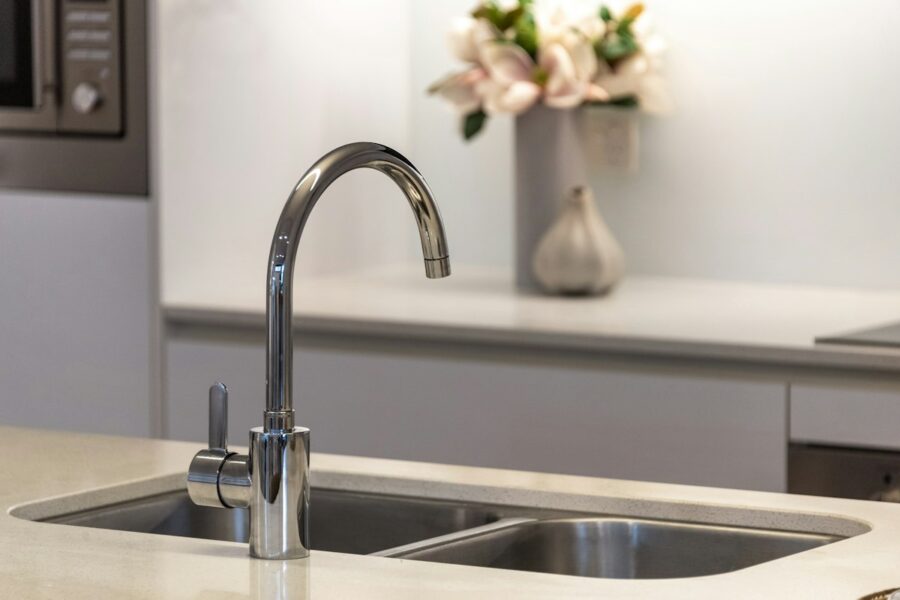
Research-based guide: our editorial policy. Illustrative kitchen photo by Steven Ungermann on Unsplash.