Leak under kitchen sink? Start by identifying where fresh moisture first appears. Water can come from supply connections, faucet hoses, the drain assembly, or from above. Stop using the sink, check for electrical hazards, and use the timing of the leak to narrow the search; a puddle alone does not identify the failed part.
This guide helps you collect useful observations before choosing a repair. It covers small, accessible leaks with no immediate hazard. A spreading puddle, damaged cabinet floor, or water near electrical equipment needs prompt assistance, not repeated testing. If you rent, report the leak to your property manager.
For a leak elsewhere, compare the visible-leak troubleshooting paths rather than applying a sink-specific procedure.
Leak under kitchen sink: contain the problem without creating another one
Stop using the sink and any appliance you suspect is involved. Keep children and pets away. If you can reach the cabinet safely, remove dry stored items and place a shallow container beneath a small drip. Avoid pushing hoses, leaning on pipes, or loading a softened cabinet floor. A container is temporary containment, not a repair.
For a continuing supply leak, close the fixture shutoff only if you can identify the valve and what it controls, can reach it from a dry position, and it turns normally by hand. Do not force a stuck or corroded valve. Closing a valve below the source of a leak may not stop that leak. If water continues or you cannot isolate it safely, contact a plumber or emergency maintenance.
Do not reach toward wet outlets, disposal wiring, plugs, or powered equipment. Do not operate the disposal to investigate a leak. Electrical isolation or inspection should be handled safely by a qualified professional when water has reached electrical components.
Identify the three areas you are looking at
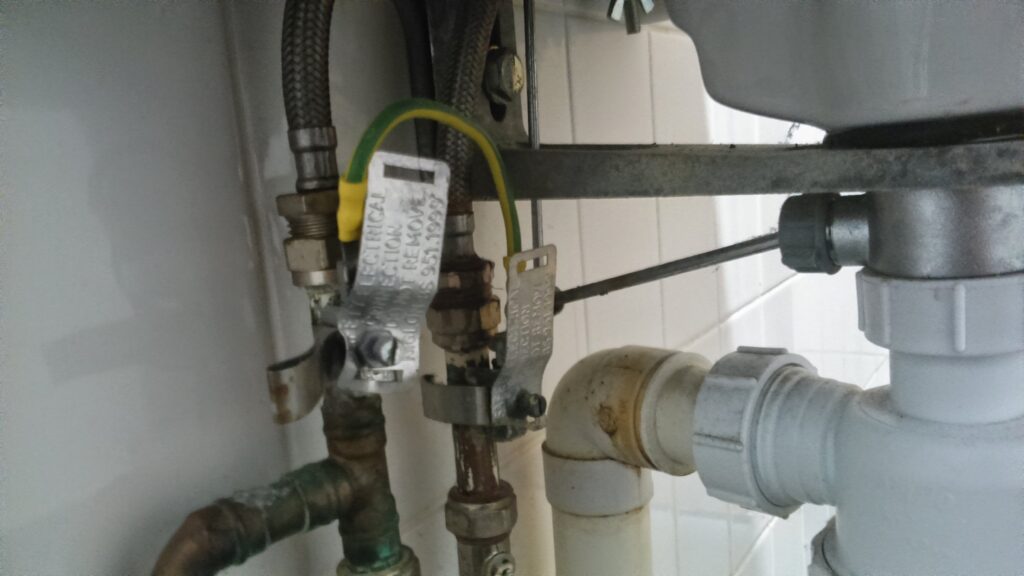
A piece of dry paper held against a safely accessible exterior joint can help reveal fresh moisture. Keep clear of electrical equipment and contaminated water; do not loosen a fitting to create a test leak.
- Supply side: the shutoff valves and lines carrying water toward the faucet. A faucet can be off while parts of this system remain pressurized.
- Faucet and sink underside: the underside of the faucet, its hose connections, the sink strainer or mounting area, and any visible route from the countertop.
- Drain side: the larger tubing carrying used water away, including the curved trap. Some kitchens also have a disposal, dishwasher drain connection, or water filter.
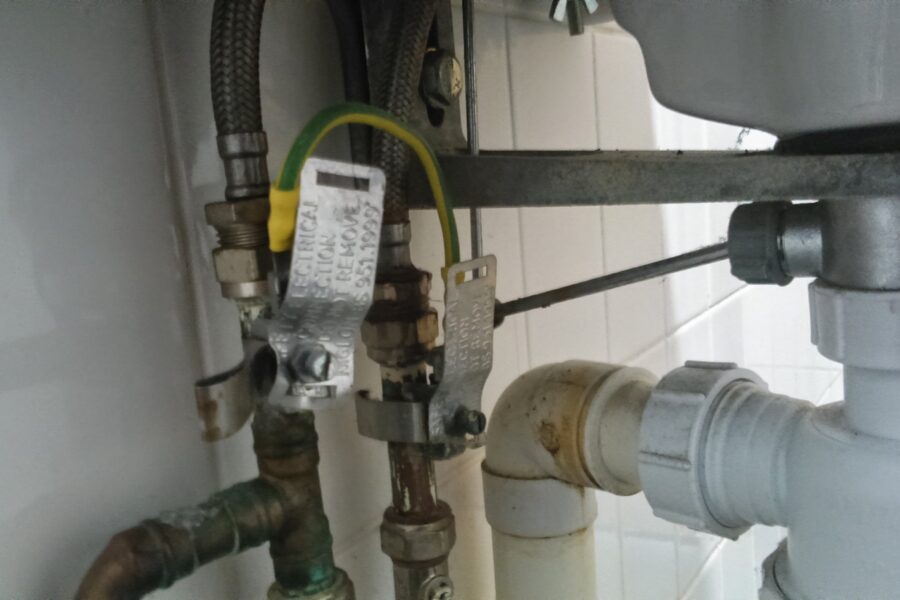
Photograph the whole cabinet before focusing on a joint. That wider view helps a professional identify the arrangement. Do not assume a diagram online matches your installation. A leak where a faucet hose joins another hose has a different service path from a leak in the household supply connection.
Why does the kitchen sink leak only when the water is on?
A leak that appears during faucet use is not automatically a drain leak. Water passes through faucet hoses as well as the sink drain, and water from above can reach the cabinet. Record the first wet point you can safely see, not just the puddle on the cabinet floor.
Moen’s under-sink guidance distinguishes continuous supply-side leakage from after-use leakage at faucet hose connections. Apply its part guidance only to the matching faucet model. For a suspected drain joint, compare the trap and slip-joint hardware reference before choosing a repair.
Use timing you have already observed with the table below. A visible ongoing leak does not need another test: stop use and address it. The following section limits any observation to a small leak, safe access, and no electrical or contamination hazard.
| What you observe | Areas to investigate | What the observation does not prove |
|---|---|---|
| Fresh water appears while the sink is unused | Supply lines and shutoffs, stored water draining from an earlier event, or nearby equipment. | That the trap needs replacing. |
| Moisture appears during ordinary faucet use | Faucet hoses, drain connections, and water passing through an opening above. | That the faucet cartridge is necessarily the cause. |
| A joint becomes wet as water drains | The drain assembly and any water tracking down from a higher point. | That tightening the closest nut will fix it. |
| Moisture follows dishwasher use | Record the water location and dishwasher cycle timing. If water spilled from the countertop vent, use the air-gap identification checks. Keep the affected appliance out of use while the cabinet is wet. | That the dishwasher itself must be replaced. |
| Several cold surfaces are damp without one clear origin | Condensation as well as possible leaks. | That all moisture is harmless condensation. |
Make one careful observation, not repeated flood tests
If the area is safe and the leak is minor, wipe accessible non-electrical surfaces dry without disturbing connections. Record the time. A dry paper towel placed on the cabinet floor beneath plumbing can help reveal a new drop; keep it away from equipment and remove it afterward. Do not wrap anything around wiring or use your hands to search behind unseen fittings.
First look with the faucet off. If fresh dripping returns, stop there and record its origin. There is no benefit in adding water when you already have a reproducible leak.
If the cabinet stays dry and you can contain a few drops safely, a brief, gentle stream into an otherwise empty sink may help reveal the first wet area. Have someone watch from outside the cabinet. Stop immediately when moisture appears. Do not fill the basin, run the dishwasher through a cycle, or leave water running unattended just to reproduce the problem.
Distinguish the point where water begins from the point where it finally falls. Water may also come from nearby plumbing, a filter, sprayer, or countertop seam.
Choose the repair path after locating the source
A supply valve or hose appears to leak
Keep the affected supply isolated if you have safely closed it. Record the valve or hose location and faucet model. Ask a plumber to diagnose damaged supply parts, persistent valve leakage, or an uncertain connection. Do not disconnect a line while it may be pressurized or assume that one replacement hose fits every faucet.
A drain joint appears to leak
Stop sending water into that drain. Identify the assembly before attempting service. A threaded-looking connection may seal with a washer rather than with its threads. In its P-trap installation guide, Oatey explains that slip-joint connections use washers and warns that excessive tightening can damage plastic parts or threads. Follow the instructions for your actual assembly; do not add tape, glue, or exterior caulk as a universal cure.
A cracked part, badly aligned tubing, or a recurring leak after adjustment warrants proper repair. Do not dismantle the trap if drain-cleaning chemicals may be present; tell the plumber what product was used. Leave alterations to concealed piping or an unfamiliar drainage layout to a qualified plumber.
Video reference: identify the trap and its slip-joint hardware
Watch the parts before selecting a repair. Oatey’s P-trap installation example shows the trap bend, connecting tube, nuts, and washers. A slip-joint washer forms the seal at the applicable connection; the presence of threads on a nut does not make thread tape the correct remedy. Follow the instructions for your actual assembly, not the color or apparent shape of another installation.
Manufacturer source: Oatey’s P-trap guide and original video. Open on YouTube if the player is unavailable. Third-party installation footage; not a leak diagnosed or repaired by The Home Fix Guide.
This is not an instruction to replace the trap automatically. Keep a leaking drain out of use. Do not disconnect it when drain chemicals, sewage backup, damaged fittings, or electrical hazards are present. A misaligned tube, damaged washer, and cracked fitting need different remedies; repeated tightening can damage parts. Have an unfamiliar assembly assessed before disassembly. If the main issue is gurgling and the vent arrangement or a slow bathroom stopper, use that separate troubleshooting path.
What if the sink leaks underneath and also drains slowly?
Treat the moisture and the drainage change as two observations to report. A puddle under the cabinet does not identify a blockage, and a slow drain does not prove which joint is leaking. Stop using the sink and any connected appliance you suspect is involved. Record the first visible wet point and which fixtures were already slow; do not fill the basin or run a dishwasher to recreate the problem.
For a problem confined to the kitchen, compare the single-bowl, double-bowl, disposal, and dishwasher drainage patterns after controlling the visible leak. Use observations you already have; do not run another test while the cabinet is getting wet.
If other fixtures are also slow or react to one another, use the shared-drain observation record. If water comes up through a tub or shower drain, stop household water use and follow the backup response steps. Tell the plumber about both the cabinet leak and the drainage symptoms. Leave connections alone if drain cleaner may remain, and keep away from water near disposal wiring or outlets.
Water seems to enter from above
Look for visible moisture around the faucet base, sink edge, and countertop after normal use. Record the route without deliberately soaking the counter. A spout drip is a different symptom: use our guide to a faucet dripping after shutoff when water comes from the outlet into the bowl rather than into the cabinet.
Dry the cabinet and follow up
After the source is controlled, remove accessible wet items and begin safe drying promptly. The EPA’s residential moisture guide advises drying affected materials within 24–48 hours to reduce the likelihood of mold growth. That is not a reason to wait before acting. Persistent dampness, swelling, a musty smell, or inaccessible wet materials may need professional assessment. Contaminated-water cleanup also needs appropriate expertise.
Once repaired, check again during ordinary use and afterward. Record the date and what changed. Our home plumbing maintenance checklist provides a place in your routine for these observations. A detector can add an alert for future moisture; see where to place water leak sensors before choosing a location. An alarm does not stop every leak or replace follow-up.
What affects the repair cost?
Price depends on the actual fault, access, local labor charges, and whether cabinet drying or restoration is also needed. A loose serviceable drain connection, a damaged faucet hose, and concealed water damage are different jobs. A generic national price range would not tell you which job you have.
Ask for an itemized estimate in USD separating diagnosis, parts, labor, any emergency charge, and drying or restoration. Check whether the diagnosis fee is credited toward repair and whether the quote includes checking for leaks afterward. Supply the model number and photographs before buying parts. Warranty coverage should be confirmed with the manufacturer rather than assumed.
A short record to give the plumber
Copy these fields into your notes. Write unknown where you cannot safely establish an answer. This is an observation record, not a diagnosis.
| Field | What to record |
|---|---|
| Time and use | First noticed: __. Faucet off / in use / just used: __. Appliance recently used: __. |
| First wet point | Exact visible location: __. Where the water finally drips or pools: __. If different, record both. |
| Pattern | Continuous / occasional / only during use / unknown: __. Other slow or backing-up fixtures already observed: __. |
| Action already taken | Sink or appliance stopped: __. Valve closed, if safely identified and operated: __. Result: __. |
| Conditions to report | Water near electrical equipment, cabinet damage, or possible contaminated water: __. Drain product already used, if any: __. |
| Equipment and photos | Faucet or disposal model, if visible: __. Disposal wet area, if present: top mounting / side discharge / dishwasher inlet / bottom or body / motor joint / unknown: __. Whole-cabinet photo: __. First-wet-point photo: __. |
Useful photos: take one wide view of the visible plumbing, one closer view of the first wet point, and a readable model label if accessible. Keep electrical equipment and unstable surfaces out of reach. Do not remove parts, move hoses, or run water just to improve a photograph.
If the cabinet is dry but household water use remains unexplained, a water meter leak test can help screen for ongoing consumption elsewhere. It cannot locate an under-sink leak by itself and should not delay action on visible water.
Frequently asked questions
Can the sink leak when the faucet is off?
Yes. Supply-side components may still contain pressurized water. Residual water from an earlier leak or another connected appliance can also appear later. Record whether fresh moisture returns after accessible surfaces are dried.
Should I tighten every connection?
No. Identify the source and connection type first. Unnecessary movement can create another leak, and excessive force can damage parts. Use the correct assembly instructions or ask a plumber.
Is a bucket enough until tomorrow?
A bucket only catches some water and can overflow. A continuing leak, spreading moisture, or electrical involvement calls for prompt help. Do not leave an active leak unattended on the assumption that it will stay small.
Sources, scope and image credits
This research-based guide helps you describe a visible leak and choose a service path. It does not report an on-site diagnosis by The Home Fix Guide. Key references checked September 21, 2026:
- Moen: faucet-use timing and model-specific hose connections.
- Oatey: slip-joint parts and sealing method for its illustrated assembly.
- InSinkErator: water can travel from a higher connection before appearing at the bottom.
- EPA: prompt moisture control and drying.
Manufacturer instructions apply to the equipment they describe. The photograph and Oatey video are credited third-party references; they do not show a repair performed by this website. See the photo credit below and our Editorial Policy.
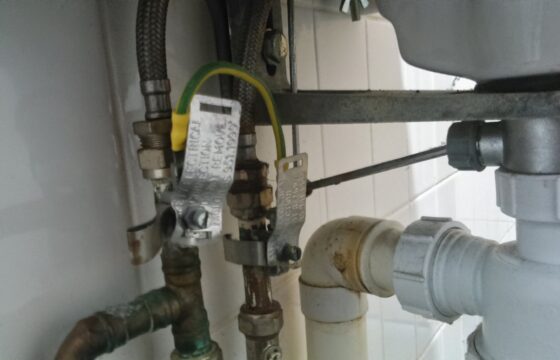
Featured and in-article plumbing photograph: 247homerescue / Wikimedia Commons, CC0 1.0. Resized and cropped for the featured view; the wider in-article image shows more of the arrangement. This is an equipment-identification photograph, not evidence of a diagnosed leak or a complete installation diagram. Installation details vary. Research-based guide; no hands-on repair by The Home Fix Guide is claimed.