On a conventional toilet using the common clipped refill arrangement, the small hose directs refill water toward the overflow opening while its end is held in the position specified by the fill-valve manufacturer. Pushing loose tubing deep below tank water can cause siphoning. A factory tower connection can use a different attachment, so identify the mechanism before moving anything.
This guide helps you compare a visible refill tube with its instructions after an ordinary gravity-tank toilet repair. It covers tube routing and identification. Work that requires removing a valve, disconnecting the supply or opening a pressure-assisted assembly needs the appropriate service procedure.
Identify the tube, overflow and fill valve
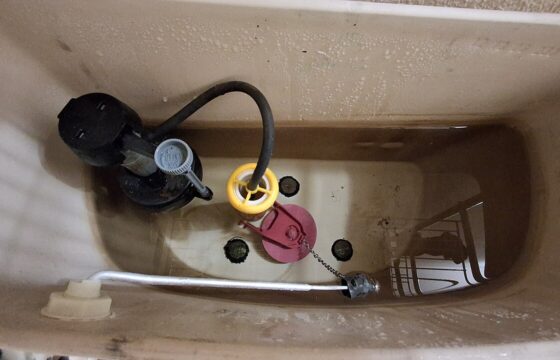
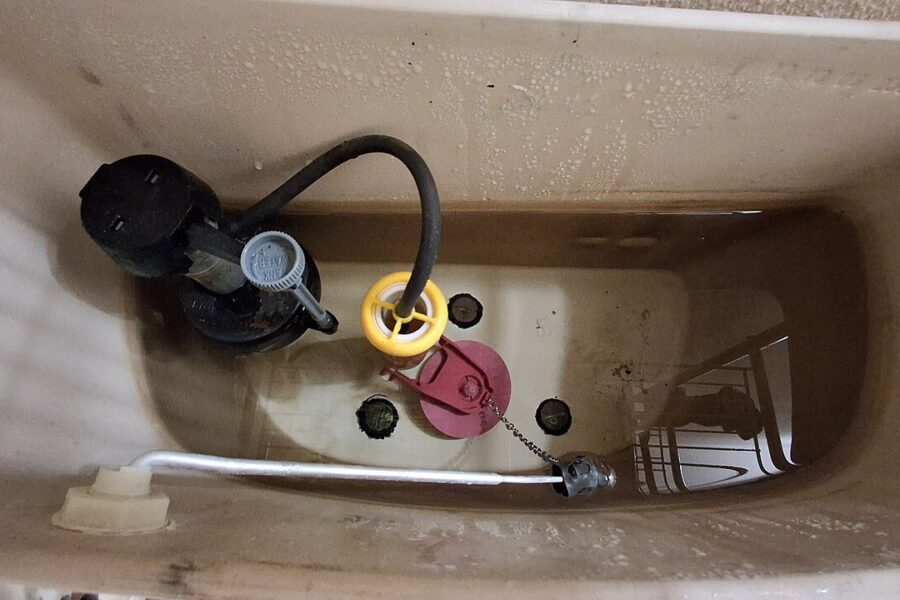
The refill tube is the small flexible hose connected near the fill valve. The overflow tube or tower is part of the tank’s flush assembly. The supply connector is outside the tank and brings water to the fill valve. Photograph the whole tank before following the small hose to its attachment.
The real-tank part comparison helps name the components. The shape and color in another toilet are examples, so keep your own tank and installed-valve model numbers together.
During refill, water can be intentionally directed toward the overflow route to restore bowl water. That differs from tank water climbing over the overflow rim. Recording which of these you see prevents a hose-routing check from becoming an unrelated tank-level adjustment.
Compare the attachment with the correct manual
Use a safely accessible, dry area for visual inspection. Set the ceramic lid on a stable padded surface. If tank water contains a cleaning chemical, follow the product’s handling directions and avoid reaching into it. Renters should contact the property manager before adjusting installed parts.
| Attachment observed | Instruction to find | Useful detail for support |
|---|---|---|
| A clip or angle adapter at an open overflow pipe | Required outlet position and the clip supplied for that valve. | Photo showing the outlet, overflow rim and resting tank water level. |
| Loose tubing extending down inside the pipe | Whether the prescribed clip is missing or the routing conflicts with the manual. | Valve model and whether repeated refilling began after the repair. |
| A molded connection on a canister or tower | The toilet-specific attachment drawing and approved adapter. | Both the tower model and replacement fill-valve model. |
| A tube that bends sharply or pulls on its connector | Permitted tube length and routing for the installed model. | Photo showing the whole route and nearby moving parts. |
Fluidmaster’s PRO45K instructions show the common angle-adapter arrangement above the overflow opening and warn that inserting tubing below water level can produce siphoning and repeated valve operation. This is a model-specific reference rather than a universal instruction for every tower. See Fluidmaster’s PRO45K installation instructions.
Korky’s 528MP installation sheet illustrates a common clipped arrangement and different attachments for certain tower systems. It also calls for checking tube length and kinking. Match the complete diagram to the installed system before deciding that an existing factory connection is wrong. See Korky’s attachment drawings on page 1.
Connect the routing observation to the symptom
If a toilet became noisy immediately after a fill-valve replacement, the original packaging and instructions are useful evidence. A missing clip, a tube pushed down the overflow, and a tube aimed away from the intended inlet are different observations to report.
A toilet that briefly refills after being quiet may also be losing water through its flush-valve seal. Photograph the tube position before starting with the running-toilet observation sequence. A refill sound by itself does not identify the path of water loss.
If tank water rises over the overflow rim, record that separately from water delivered by the small hose. Use the running-toilet guide to compare the model’s fill-level requirements. Keep the overflow route open.
If the bowl remains unusually low after refill, tell the manufacturer whether the hose delivers water to the prescribed place and whether the symptom started with a repair. Keep a low level after refill separate from a level that falls later. Kohler describes tank and bowl refilling as part of the fill-valve stage. Read Kohler’s explanation of the cycle.
Make a model-specific check before changing the route
- Save the starting view. Photograph the installed hose, outlet attachment, tank marking and fill-valve label.
- Find the matching instruction sheet. Use the actual fill valve and toilet or tower identifiers. If two instructions appear inconsistent, send both to support before altering the connection.
- Follow the complete isolation procedure. A manufacturer may require the supply off before a correction. Stop if the shutoff is leaking, stiff or unfamiliar. An observational check does not require loosening the supply connection.
- Make only the documented correction. Use the specified clip or adapter. Keep the intended routing clear of the float and linkage. Tube trimming should follow the model’s directions and requires safe isolation.
- Record the result of a normal cycle. When the manual allows the supply to be restored and the bowl drains safely, note where refill water goes and whether filling stops. Stop for an external leak or rising bowl.
Do not improvise a submerged tube, a glued fitting or a blocked overflow. If a required attachment is missing, obtain the correct component or have a plumber finish the installation. Buying another fill valve without checking the connection can leave the same installation problem unresolved.
Prepare a useful support request
These fields keep the toilet’s identity separate from a replacement valve. They can be copied into a message to the manufacturer or property manager. Use photographs of accessible parts and leave unknown measurements blank.
Toilet brand and complete tank identifier
Installed fill-valve model
Overflow pipe or tower identifier
Clip, angle adapter or factory attachment observed
Tube outlet position and any kink
Tank level after filling stops
Symptom and whether it began after a repair
Instruction sheet and diagram being compared
Photos and any reason the inspection was stopped
For other symptoms, use the toilet troubleshooting overview. Source material was checked November 5, 2026. This is a document-based guide rather than an installation performed by our team. Read our editorial policy for the sourcing approach.