When a toilet flushes twice after one handle press, check whether a compatible flapper is staying open too long. First distinguish that pattern from a brief refill several minutes later or a bowl that needs a second manual flush. The timing determines which check is useful.
This guide covers accessible gravity-tank toilets with a hinged flapper. Identify the toilet and installed valve before changing a setting. For a canister, pressure-assisted tank, concealed cistern or electronic control, use its own service instructions.
Identify which kind of double flush you have
Listen and look during ordinary use before buying a part. A refill sound is easy to confuse with another flush. Write down whether the handle was pressed once or twice, whether the bowl cleared, and when the next sound began.
| What happened | Next step |
|---|---|
| One handle press, two clearing surges during that flush | Observe flapper closure and handle return under the conditions below. |
| The toilet becomes quiet, then briefly refills without anyone using it | Follow the running-toilet checks and record whether tank water is being lost. |
| You press the handle twice because the first flush leaves waste behind | Use the weak-flush guide to separate tank delivery from drainage. |
| The bowl rises high or wastewater appears elsewhere | Stop flushing and arrange help. Describe the rising bowl or backup first. |
A name such as “double flushing” does not establish a failed component. Keep the actual sequence in your notes so a manufacturer or plumber can distinguish a tank-control issue from poor waste removal.
Watch the flapper and handle together
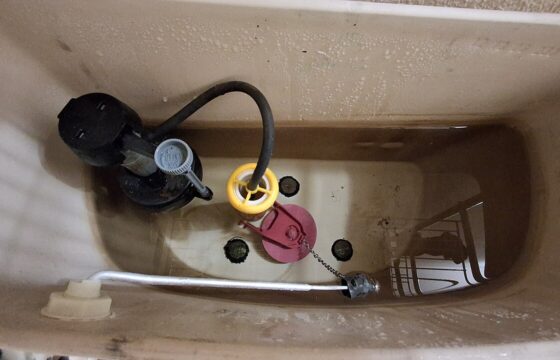
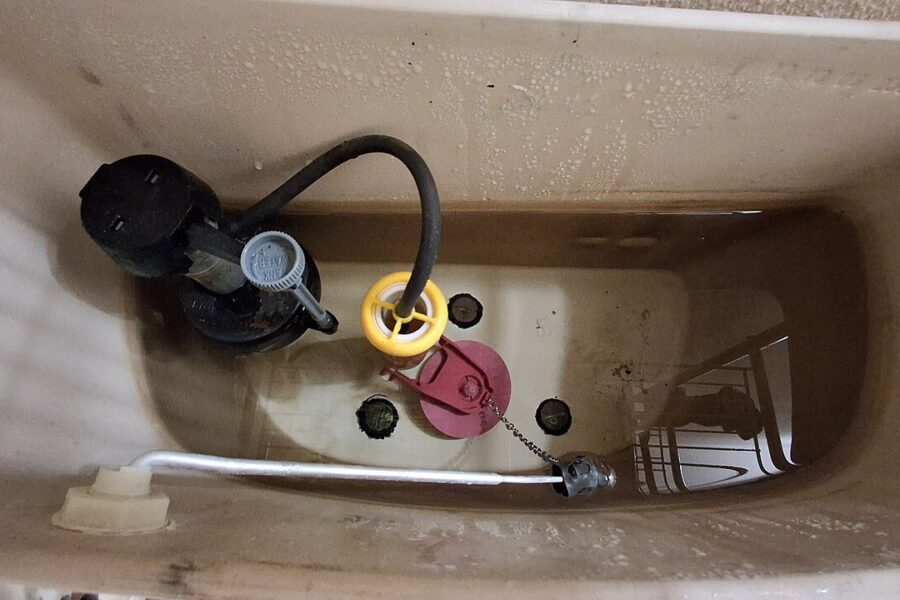
If the floor is dry and the bowl drains normally, lift the heavy ceramic tank lid with both hands and set it flat on a stable padded surface. Photograph the tank marking, installed flapper and starting adjustment. Renters should involve the property manager before changing a fixture.
During one normal flush, release the handle as usual and observe whether it returns, whether the chain catches, and whether the flapper seats. Keep hands and tools clear of moving parts. Stop further testing if water escapes or the bowl rises.
In a gravity toilet, tank water initiates the bowl-clearing cycle and the fill valve then replenishes water. Noting flapper closure separately from refill shutoff makes the sequence easier to describe. Kohler explains these stages in its flush-cycle overview. Read Kohler’s flush-cycle explanation.
Korky identifies excessive flapper opening time and chain setup as checks for a toilet that flushes twice after one handle press. Its guidance also emphasizes the correct flapper. Apply an adjustment only when the instructions match your installed part. Read Korky’s double-flush guidance.
Choose the adjustment for the installed mechanism
Find a readable part number or ask the manufacturer to identify the component from photographs. A colored rubber seal alone does not identify its settings. The model-number lookup guide separates toilet identification from a previously replaced valve.
- A flapper with a marked dial or band. Record its initial setting and find the matching adjustment chart. Follow the stated direction and change one setting at a time. There is no useful universal dial number for every toilet.
- A Korky 2004 float-style flapper. Korky says moving the yellow chain float toward the handle arm shortens its opening time. This instruction applies to that documented float-style design. Confirm the part before using it. Check the Korky 2004 instructions.
- A caught or tensioned chain. Use the chain attachment and slack specified for the mechanism. Check the lever’s return and clearance. Copying another toilet’s chain length can change how the seal lifts and closes.
- A fixed flapper or an unfamiliar mechanism. Check the compatible replacement part and its calibration with the manufacturer. A kit containing more components does not establish which ones need service.
Do not change the tank water level at the same time as flapper timing. That would make the result harder to attribute. Use the toilet’s prescribed fill mark when assessing level. If a permitted setting change leaves an incomplete flush, return to the documented starting setting and ask for model-specific advice.
If this started after replacing the flapper
Keep the package, receipt and old part number if available. Compare the exact compatible-model list, flush-valve size and adjustable settings. Physical fit is only one part of the comparison.
Tell the supplier what changed and what stayed the same. For example, report a new seal followed by two clearing surges, with no change to the tank-level setting. This organizes a support request without assuming the new component is defective.
If the complaint is actually refilling between uses, use the tank-to-bowl dye test under its stated conditions. That observation addresses leakage rather than how long a flapper remains open during a commanded flush.
Keep a short before-and-after record
Copy the fields below using observations already available. Leave unknown items blank. A record of one permitted adjustment is more useful than several unrecorded changes.
Toilet brand and complete tank model
Installed flapper or flush-valve part number
One handle press or a second manual press
Two surges immediately or a refill after quiet time
Handle return and chain movement observed
Original setting and the single permitted change
Bowl cleared normally after the change
Leak, rising bowl or other reason to stop
Manufacturer or plumber contacted
Arrange professional help when the handle binds repeatedly, parts cannot be identified, the prescribed adjustment fails, porcelain is damaged or water appears outside the toilet. A stiff shutoff valve should be assessed rather than forced.
For the complete symptom map, return to the toilet troubleshooting overview. This research-based guide was prepared from the linked manufacturer material on November 5, 2026. It does not document a repair or product test by our team. Our editorial policy explains how sources and practical limits are presented.