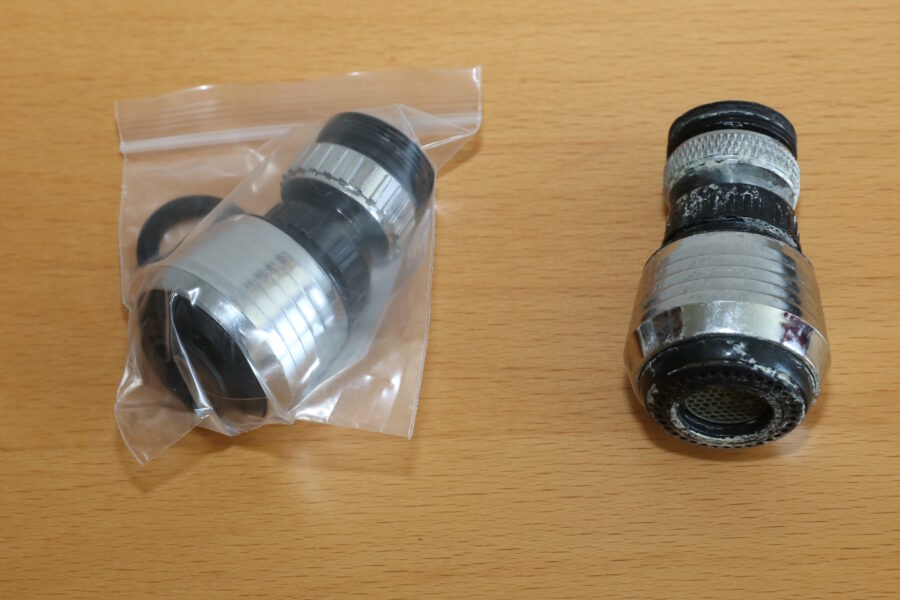
How to clean a faucet aerator safely depends on the outlet design. First identify the outlet and its care instructions. Without removing it, clean only the accessible surface with an approved method; that may not clear debris behind the screen. For a removable aerator, use the specified tool, rinse the serviceable part, reinstall its seals correctly, and check for leaks. Stop if it is stuck.
Not sure the outlet is the right place to start? Compare the weak-flow troubleshooting paths for one faucet, a shower, or several fixtures.
When aerator cleaning makes sense
A stream that sprays sideways, has become uneven, or weakened at one faucet may justify checking its outlet. First compare hot and cold flow and another fixture. If every fixture changed at once, cleaning one screen may not address the cause. Our one-faucet low-flow guide explains those comparisons.
An aerator shapes the outgoing stream. It does not perform the handle’s shutoff function. If the faucet keeps dripping after you turn it off, see the persistent faucet drip guide before assuming a dirty screen is responsible.
Identify the outlet before reaching for tools
Use the model number, original paperwork, or the manufacturer’s parts diagram. Photograph the underside of the spout with good lighting. A removable metal ring, a recessed insert, and a pull-down spray head may look similar from above but require different service procedures.
| Outlet style | What to establish first | Avoid |
|---|---|---|
| Exposed aerator housing | Whether the housing unthreads and how the finish must be protected | Gripping decorative surfaces with bare pliers |
| Recessed or concealed insert | Correct key or specified fastener for the model | Forcing a nearly matching key |
| Pull-down spray head | Whether the screen is serviceable separately | Assuming the entire head should be dismantled |
| Open spout with no visible aerator | Manufacturer’s low-flow troubleshooting procedure | Prying the spout apart to find a screen |
Moen’s aerator guide documents exposed, concealed, and non-accessible designs, including models with filters elsewhere. Use it for identifying a Moen design; it is not a universal disassembly guide for every brand. This article covers an accessible outlet only, not supply-line filter removal.
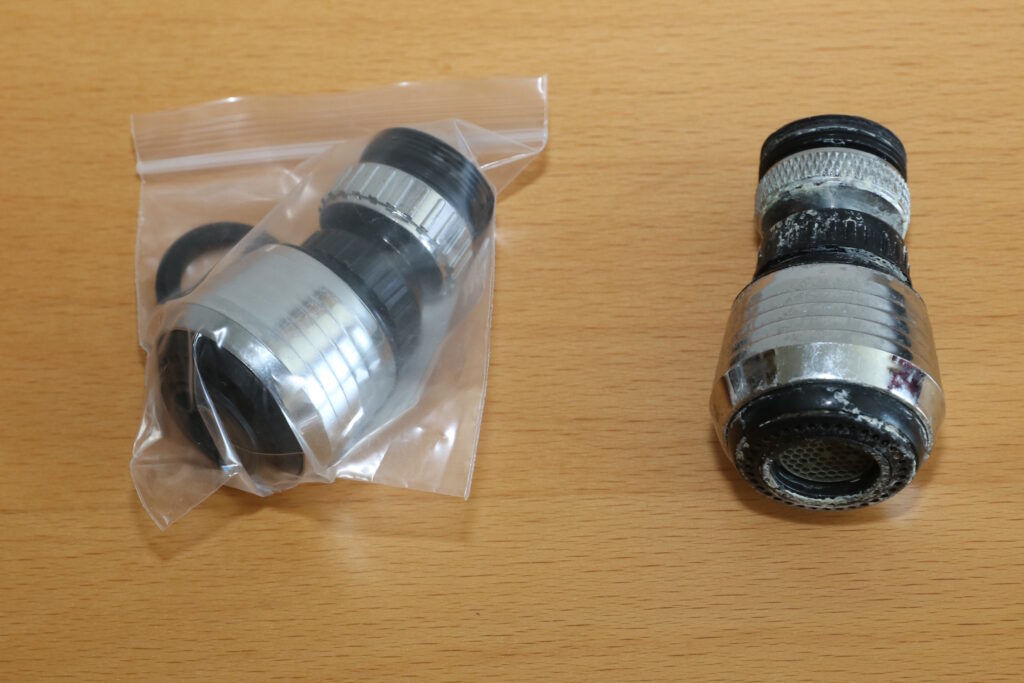
Look at three things before cleaning
- Outlet style: exposed threaded shell, concealed insert, or pull-down spray head. Use the correct service instructions and key.
- Sealing surfaces: keep the washer and inserts in their original order; inspect for damage as well as deposits.
- Result: compare the same hot/cold setting before and after. If flow stays weak, stop treating visible scale as the entire diagnosis.
EPA demonstration: replacing a faucet aerator
U.S. EPA WaterSense shows an aerator replacement. This short video has music and no spoken instructions. It complements the steps below; it is not a universal removal method for concealed aerators or pull-down heads. Follow the faucet manufacturer’s cleaning and reassembly directions. Watch the source video on YouTube.
How to clean a faucet aerator without removing it
Without removal, limit the job to accessible surface cleaning. It may remove visible residue, but it does not establish that debris behind the screen has cleared. A stuck aerator is not a reason to use a stronger chemical treatment.
- Confirm the care instructions. Identify the faucet model and finish. Turn the faucet off and let hot surfaces cool.
- Wipe the accessible outlet. Use a soft damp cloth; add mild dish soap only where the maker permits it. Keep to the approved contact time and avoid nearby surfaces that are not compatible with the cleaner.
- Rinse and dry as directed. Do not leave cleaning product on the finish. Never mix cleaners, push pins through openings, or use an unapproved descaler.
- Recheck the same setting. With the basin draining normally, open the faucet gently and compare the stream. Stop if water appears at a connection or under the sink.
If flow is still weak: identify the serviceable insert and correct removal tool before proceeding to the next section. Do not pry a concealed insert out, force a seized fitting, or leave a vinegar bag on an unidentified finish overnight.
Sources: Moen’s finish-specific care instructions and aerator identification guide. Follow the instructions for your own model and finish; non-accessible filters need a different service procedure.
Remove and clean a serviceable aerator: prepare the workspace
Turn the faucet off and make sure nobody will use it while the outlet is removed. Let any hot surfaces cool. Close or cover the drain so a seal cannot fall through, and put a shallow tray beside the sink. Have a soft cloth, a small soft brush, and the specified removal tool ready.
Take a photo before each layer is moved. Keep a washer, housing, and insert together as an assembly when possible. Do not disassemble an insert into loose screens merely because they appear separable. Some parts are intended to be replaced as a unit.
If the procedure extends to disconnecting a hose or supply connection, pause. That requires a separate, model-specific procedure and reliable supply isolation. Do not disconnect a pressurized line as part of routine outlet cleaning.
Remove and rinse the serviceable component
Follow the model’s removal directions, including the viewing orientation used in the instructions. “Clockwise” can be misunderstood when looking down at a fitting that is actually being serviced from below. If the part resists the prescribed method, stop rather than increasing leverage.
Rinse loose debris from the removed component at another faucet into a container. Use a soft brush gently if the manufacturer permits it. Do not poke metal needles through calibrated openings, drill out a restrictor, or discard screens to create a stronger stream. Preserve the designed flow rate and components.
For deposits that do not rinse away, check the manufacturer’s permitted product, dilution, and exposure time. There is no single vinegar soak suitable for every finish, plastic, seal, and faucet design. Keep cleaning solution away from stone counters and surrounding finishes unless their own care instructions permit it. Never mix cleaners.
Inspect before reinstalling
Look for a torn or distorted seal, damaged threads, a cracked housing, or an insert that cannot be cleaned without damage. Photograph these findings. Cleaning is not a repair for a damaged seal or stripped thread.
Match a replacement by the exact part number and specified flow rate, not simply by a similar diameter or color. If the faucet is under warranty, contact the manufacturer before purchasing. Ask whether the replacement includes the seal and removal key; these are easy to overlook when comparing packages.
Reassemble and check the result
- Return components in the documented orientation with the correct seal seated.
- Start threaded parts gently so they engage squarely. Stop if they bind.
- Tighten according to the manufacturer, without using extra force to conceal a sealing problem.
- Clear the sink, open the faucet gradually, and check the stream and the joint around the aerator.
- Turn the faucet off and inspect again for water where it should not be.
Compare the result with the original symptom. A straighter stream is a useful observation; it does not prove the home’s water pressure changed. If flow remains weak, document whether the issue affects hot, cold, or both before replacing more parts. Keep the conditions and measured result together in the faucet flow observation record, using the same cool-water setting before and after any cleaning.
If the faucets flow normally but the shower is still weak, follow the checks for weak flow at the shower only. A sink-aerator procedure does not apply to the shower valve or head.
When professional help is the better choice
Stop for a seized fitting, movement of the whole spout, damaged threads, an active leak under the sink, or any procedure you cannot identify confidently. A plumber can distinguish a restricted outlet from a supply or internal-valve issue. If multiple fixtures changed suddenly, contact the water utility when appropriate before assuming every faucet needs service.
Cost questions before buying parts
If the component rinses clean and the seal is sound, this task may require no replacement part. Otherwise compare the correct insert, housing, seal, and required tool as one total. A low-priced insert that needs an unavailable proprietary key may not be a useful purchase.
For professional work, ask whether the service charge includes diagnosis and whether the quote changes if the aerator is seized. The part price alone does not represent the cost of a visit. Do not replace a complete faucet until the fault and repair availability are understood.
Frequently asked questions
Should I remove the flow restrictor?
No. Restore the intended operation and specified flow rate. A designed lower flow is different from an obstruction.
How often should I clean the aerator?
Follow the fixture’s maintenance guidance and respond to visible debris or a changed stream. Water conditions and fixture design vary, so one calendar interval does not fit every home.
Will this solve an unusually high water bill?
Cleaning a restricted outlet does not diagnose unexpected consumption. Start with our high water bill checklist if that is the concern.
Can I put the parts back without the washer?
Do not omit a specified seal. Find the correct replacement and follow the assembly diagram.
Browse more Plumbing & Water guides for related troubleshooting.
Featured and in-article component photograph: MKFI / Wikimedia Commons, released into the public domain. Resized and cropped for article previews. The photograph shows two separate swivel aerator assemblies, one new and one used with damaged threads. It is not a before-and-after cleaning test or a repair performed by The Home Fix Guide.